You can also conveniently save any report to a file or email a report directly. For example: You may want to save an Event Schedule Report to email to your DJ....or...you may want to save a Revenue Report or Employee Fee Report to email to your Accountant....or you may want to save a Contract to email to your client. All forms and reports can include your custom logos and pictures.
Step 1- From the Main DJCalendar Form, select "Tools" from the menu bar, then select "Print Reports".
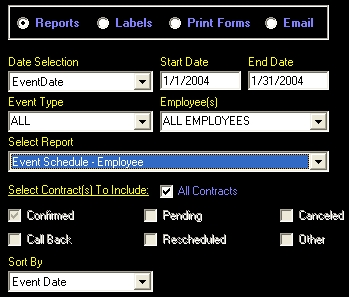
Step 2- Click on the option button labeled "Reports", then select your search criteria, now select your report type. Finally, click on the button labled "View Report".
Step 3 - You should now see your report. You can optionally email this report by clicking on the button labeled "Email This Document" or Print your report by clicking on "File" from the menu bar, then selecting "Print". Here are some samples of available reports.
Event Schedule: This report contains event information which you can print for a calendar month, specific employee, or even a specific date range.
Revenue: This report contains the revenue breakdown for your company. You can print this report by Advertisement type to see what Advertisement methods are doing the best for your company, or print this report by Event Type to see what type of Event brings your company the most revenue. You can print this report for a calendar month, calendar year, or specific date range.
Employee Fees: This report contains the fees paid to your employees for confirmed contracts. You can print this report for a calendar month, calendar year, or specific date range.
Payments Received: This report contains the payments received by your clients. The report includes payment date, payment check #, and payment amounts. Use this report to help reconcile your bank accounts. You can print this report for a calendar month, calendar year, or specific date range.
Outstanding Balances: This report contains the outstanding balances owed to you for confirmed events. You can print this report for a calendar month, calendar year, or specific date range.
Contracts Still Pending: This report contains the contracts which are not Confirmed. You can view the information in a report, or you can choose to scroll through the pending contracts from the Contract Form.
Contracts Expired: This report contains the contracts which are not Confirmed and have expired. You can view the information in a report, or you can choose to scroll through the expired pending contracts from the contract form.
Mileage Report: This report will give you a breakdown of mileage accumulated by employee. This report can be used if you reimburse your employees for accumulated mileage. You can print this report for a calendar month, calendar year, or specific date range.