1. Reminder Alarms
The Reminder Alarm is a wonderful feature to help you remember items
scheduled for the future. For example: You may want to give
yourself a reminder a month in advance to pay your website domain rental next
year...or maybe even a reminder to meet a wedding client next week.
These reminders will appear immediately when you open your DJCalendar
program. If the reminder date has passed, the reminder alarm will still
notify you until you either delete the reminder or turn the alarm off.
There are no limitations to the number of reminders you schedule for yourself
or staff and you can date your reminders as far in advance as you wish.
Step 1: From the main djcalendar form, click "Tools", then select
"Reminder Alarms/Checklist Items".

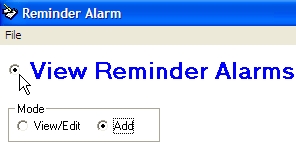
Step 2: To add a new reminder, select the option button
labled "View Reminder Alarms", then click on the option button labeled
"Add".
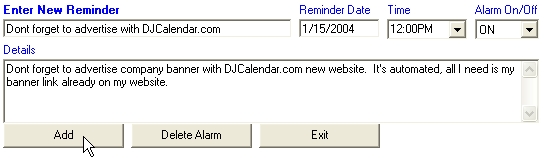
Step 3: Enter your Reminder details and then click on the
button labled "Add".
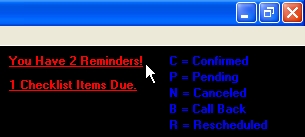
Step 4: Congratulations, you have setup your first reminder
alarm. When the reminder is due, you will notice a "red" label on the
main djcalendar form. Simply click on the "Red" label to view the
alarms. See illustration below.
2. Checklist Items
The reminder checklist items are very useful for each
event scheduled. You can designate up to 10 checklist items for each
event. For example, checklist items may be utilized to remind you to
Send A Contract, Send A Wedding Application, Send A Reminder Letter,
etc... You can customize your own checklist items on the "Setup Options
Form". For more information, click here.
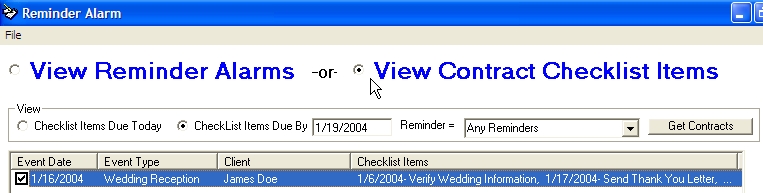
Step 1: To view your checklist items that are due,
select the option button labeled "View Checklist Items". If you look at
the illustration below, you can view Checklist items due today, or view
specific checklist items due by a specific date.
Step 2: You can now view the actual contracts or
send an email to all reminders listed. Simply click on the checkboxes
for each checklist item you would like to include and then click on
the button labeled "View Contracts" or "Send Email".

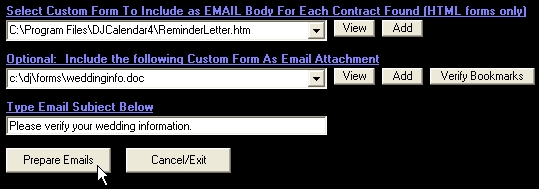
3. Send A Email To All of Your
Clients With Overdue Checklist Items
Step 1- Sending an email to a specific group of
checklist items is similar to the Email Broadcast feature. Once you have
retrieved your overdue checklist items, click on the button labeled "Send
Email".
Step 2- Use the checkboxes to indicate which clients and
checklist items you would like to include in the email. Then select your
email documents, enter a subject and click on the button labeled "Prepare
Emails".
Step 3- You should now see the Email Form, simply click
on the "Send Broadcast Emails" button to send your emails. Note:
If your email documents contain contract [Merge Fields] or Microsoft Word
"Bookmarks", each document will automatically include the clients information
inserted in place of the [Merge Field] names or
"Bookmarks".