DJCalendar interacts with Microsoft Word documents similar to the way DJCalendar interacts with HTML Custom Forms. You create a custom form template in Microsoft Word and DJCalendar will automatically insert your client data. The only difference is that we use "Bookmarks" when working with Microsoft Word Documents as opposed to using "[Field Names]" when working with HTML Custom Forms. The good news is that the "Bookmarks" inserted into your Microsoft Word Documents will use the same name as the "[Field Names]" inserted into your custom HTML forms. To make a long story short, when printing or emailing a Microsoft Word document, DJCalendar searches for "Bookmarks" in your Microsoft Word Document and replaces each "Bookmark" with the client's actual data. Click Here for more information on inserting "Bookmarks" into Microsoft Word Documents.
HTML Custom Form Templates
DJCalendar
interacts with your Custom HTML forms by replacing the contract [Field
Names] found in your templates with the client's actual data before
printing or emailing your custom form. Click here for more information on inserting
[Field Names] into custom html forms.
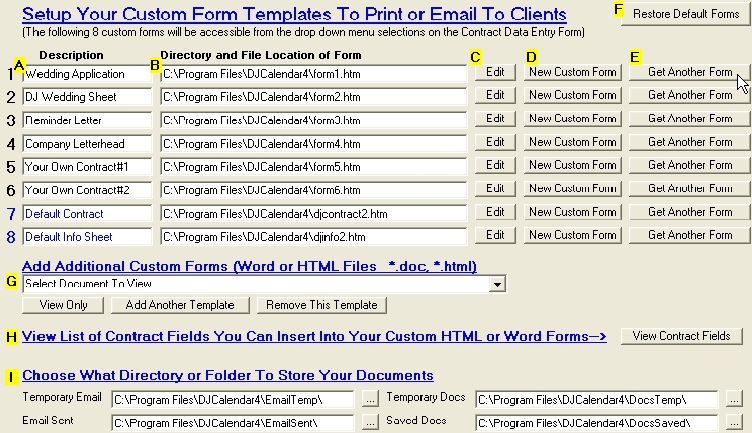
Step 1: You can store your custom form templates on the "Setup Options Form" so you can later conveniently access these custom forms from the menu bars and drop down menus throughout the DJCalendar program. To go to the "Setup Options" form, from the main djcalendar form, select "File", then "Setup".

Step 2: Click on the tab labeled "Custom Forms"
Step 3: To store a custom form, click on any of the 8 buttons labeled "Get Another Form". You will notice that an explorer box will pop for you to locate your custom form. Find your form and click the button labeled "Open".